Web service element
Web Service Element
Overview
Invoking services of an external system is easily configured in Bizagi through the WS Connector.
The WS Connector supports standard SOAP and RESTful services and features a graphical mapping that allows for inputs and outputs to be handled without the need for programming.
Overriding the graphical mapping in the WS Connector is also supported when there is a need to use custom XSLT transformations.
For more information, refer to Invoking external services from Bizagi.
For sophisticated scenarios where configuring web service invocation is not possible through the WS Connector (either with graphical mapping or custom XSLT files), you may choose to:
- Rely on the Component library feature to develop your own client that invokes a web service (preferred option).
- Invoke a web service from a business rule in Bizagi by making use of the Web service element inside business rules (deprecated, preserved mainly for backward compatibility).
For such cases, it is best for maintainability and recommended in terms of best practices to rely on the Component library feature.
Note:
If the input or output parameters of the web services you will be invoking involve complex XML elements (not primary data types such as int), you may rely on methods of Bizagi's rules API that handle XMLs and information in Bizagi.
For more information about this API, refer to XML Helper for interfaces.
When Are the Alternatives Above Valid?
Sophisticated scenarios not possible through the use of the WS Connector include:
-
Web services built complying with unsupported standards:
While the WS Connector supports a comprehensive set of standards involving SOAP 1.1 and 1.2, WSDL 1.0, and extensions such as WS-Security, certain standards may not be supported. In such cases, use the Component library feature (not the Web service element in rules). -
Invoking a web service while iterating over a collection:
This means the web service does not receive an array of items but information for a single element instead, requiring multiple invocations.
Note:
The Web service element inside business rules has certain restrictions, such as support only for SOAP 1.1 (with limited support) and exclusion of elements likexs:choice. Therefore, the WS Connector is recommended.
Using the Web Service Element
To create a Web Service from a business rule, include a Web service element and configure the invocation.
Example
In this example, a Web Service has a web method that receives and returns simple data types (e.g., integer, string, Boolean):
We will use a Vacation Request Process. This process will invoke a SOAP Web Service at the very beginning to verify (look up) the number of available vacation days for the employee requesting vacations.

The Web Service will return a number (integer) for this request. While invoking the business rule, we can manipulate the response before updating it into our data model.
Steps
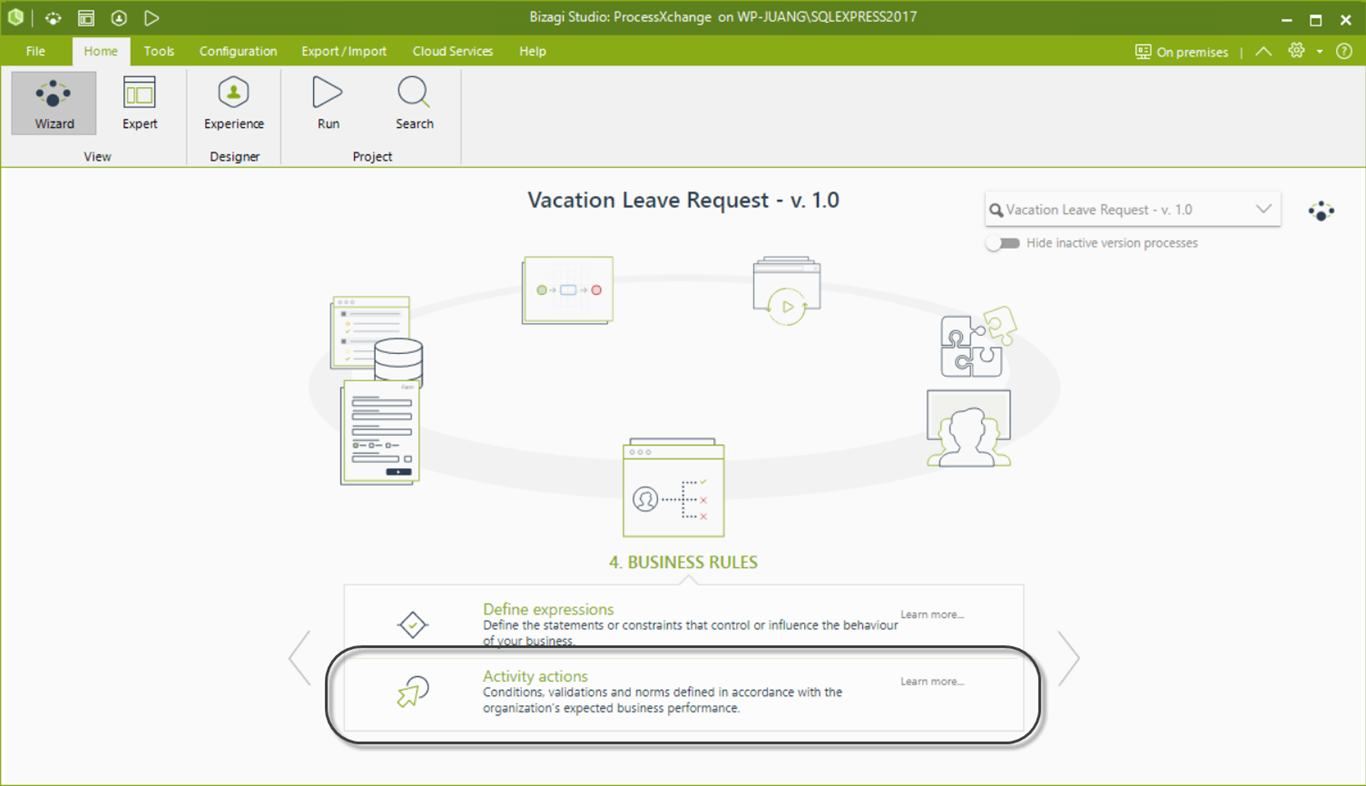
1. Create a new business rule to invoke the Web Service.
Go to the fourth step of the Process Wizard (Business Rules) and select Activity Actions:
2. Click the Activity which will include this expression. Create or edit the rule.
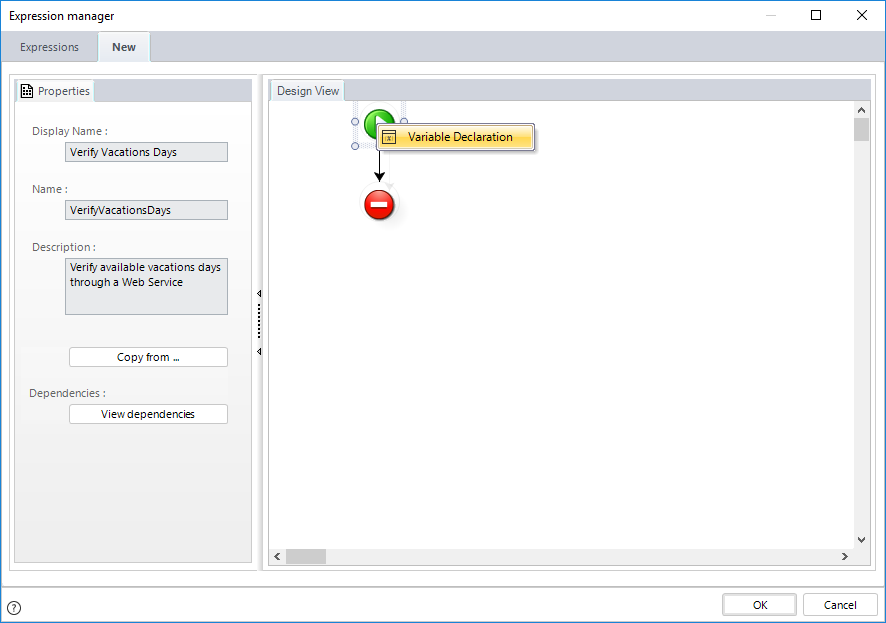
After defining the Name, Display Name, and Description properties, create a variable for this invocation (to store the response result) by right-clicking on the green Start button and selecting Variable Declaration.
3. Click Add to create a new variable and select the integer type column (int).
Give it a Name and click OK.

You may set a default initial value. Click OK.
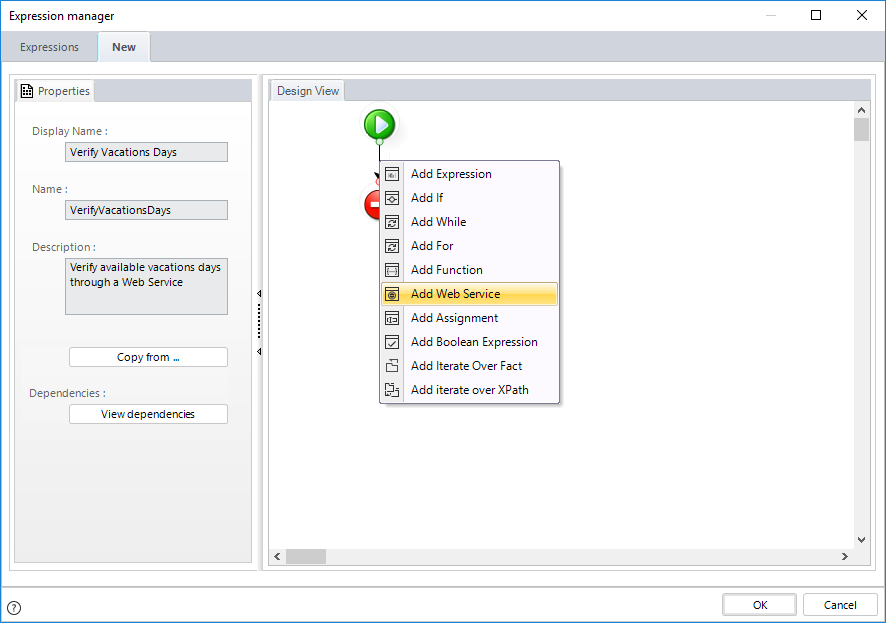
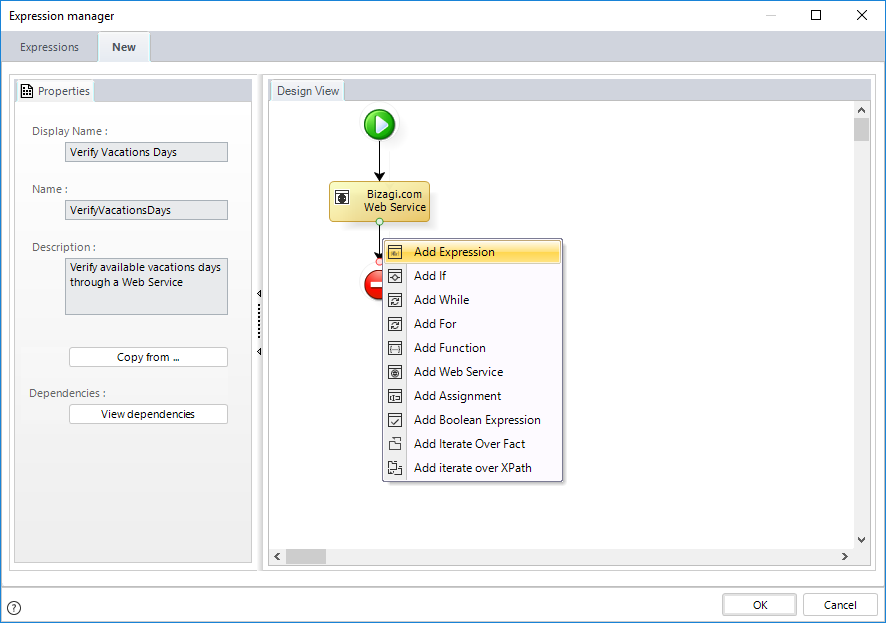
4. Right-click the vertical line of the rule and select Add Web Service.
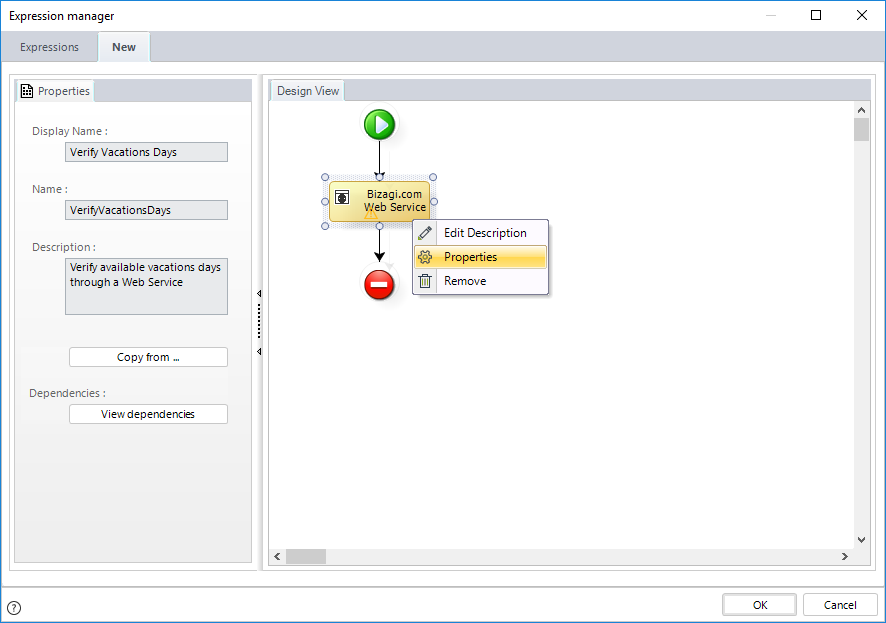
5. Right-click the Web service element and select Properties.
This will launch a wizard to guide through the Web service invocation.
6. Enter the URL location of the Web Service.
In this example, we enter:
http://www.bizagi.com/ESB/ESBServices.asmx
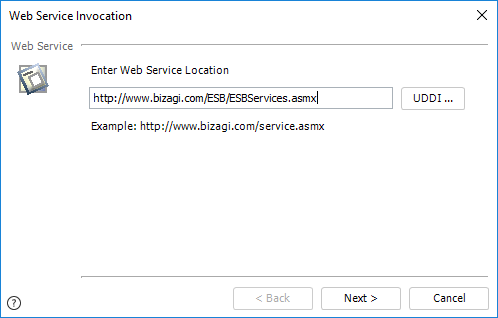
Click Next.
7. Select the Web method from the methods provided by the selected Web Service.
Click Next.

8. Set the values of the input parameters.
Bizagi automatically detects if the chosen method expects input parameters and their data types.
Select the parameter, click Set Value, and define its value.
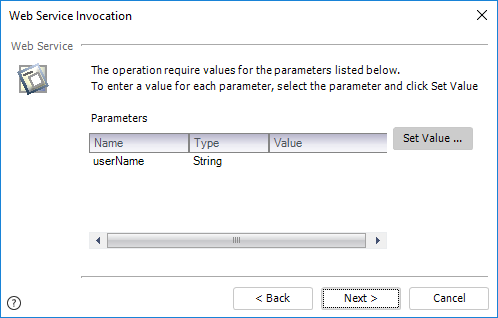
In this example, our method receives a single parameter of type String. We use a XPath expression to set the value.
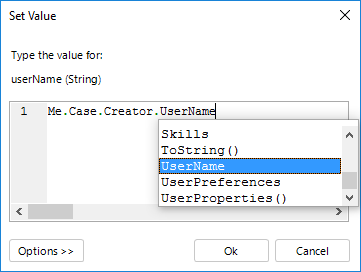
Click OK, then Next.
9. Select the variable in which the response result will be stored.
In this example, this is the tempResponse variable created in step 3.
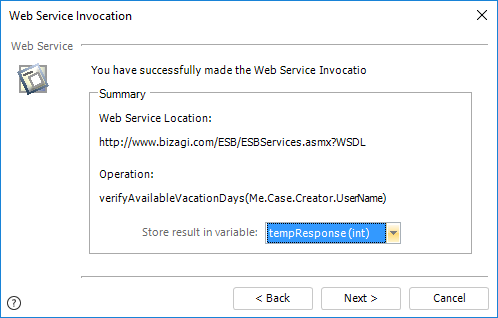
Click Next to finish the configuration.
10. Include any required manipulation for the result.
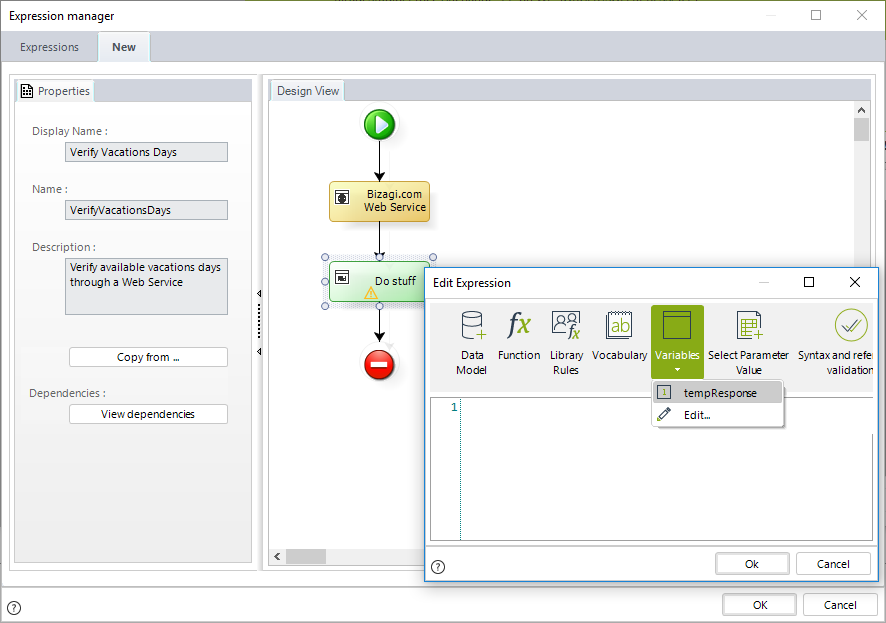
Continue editing the rule so that further manipulation can be performed on the tempResponse variable.
For example, include an inner expression element to perform calculations on the information (e.g., add, subtract, or round the result).
To edit the scripting of this expression, double-click the expression:
11. Assign the calculated information to the data model.
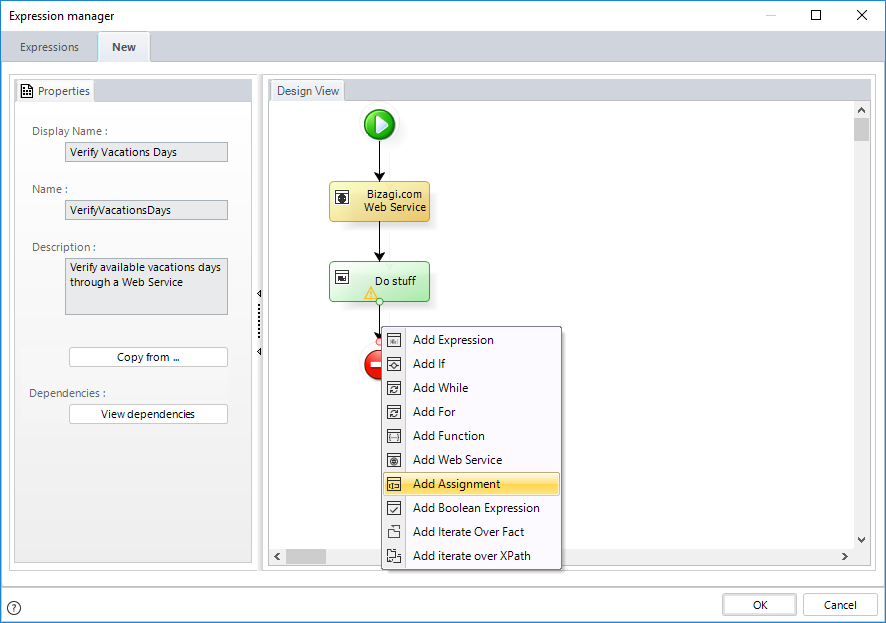
Include an Assignment element:
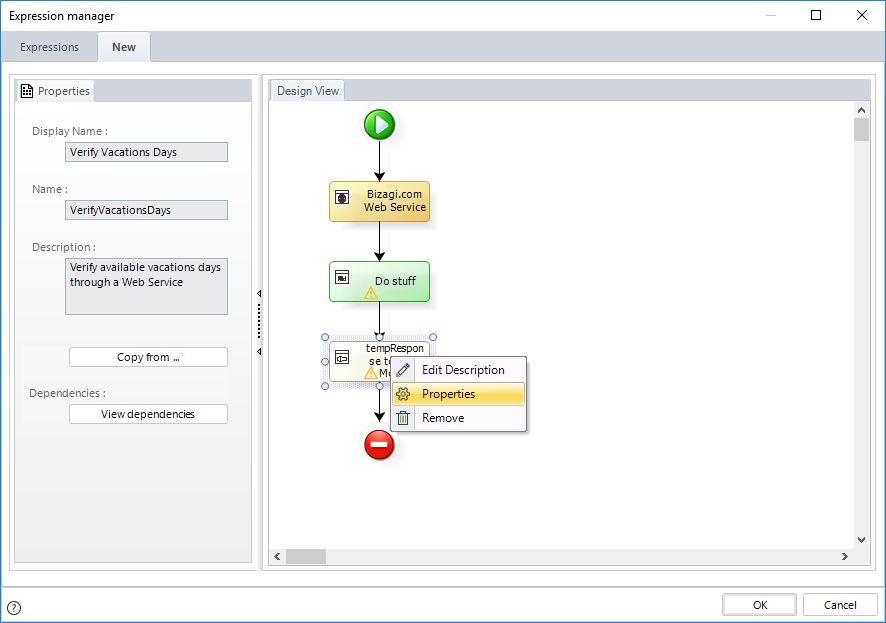
Right-click the Assignment element and select Properties:
12. Set the variable to an attribute in the data model.
Assign the tempResponse final value to an attribute in the data model (e.g., DaysAvailable in the VacationRequest entity).
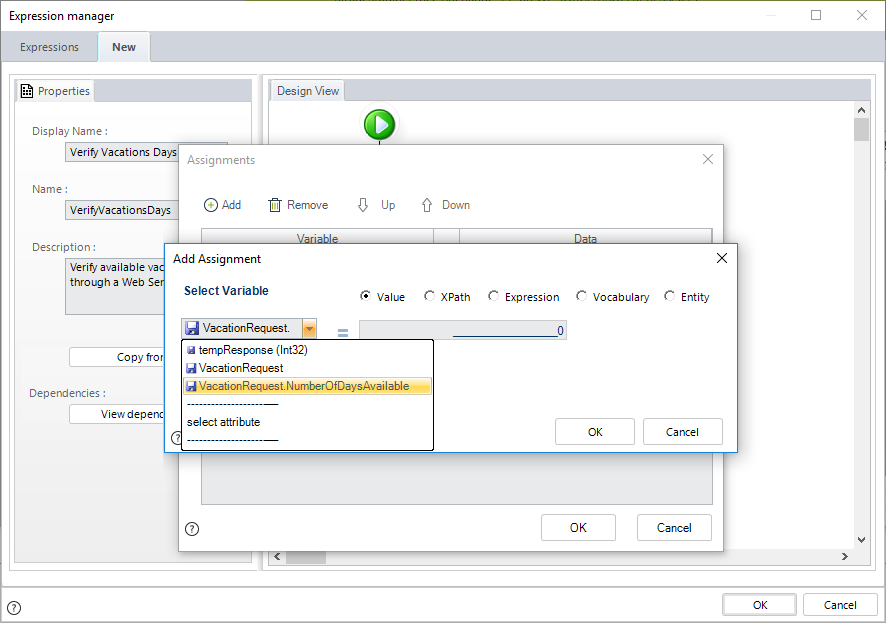
Select Expression and type the variable name directly:

Click OK to save the business rule.